Surya Namaskar – How to do Sun Salutation with Steps | Surya Namaskar steps with pictures and benefits
The Sanskrit name ‘Surya’ here refers to the sun and ‘Namaskar’ means salutations. Surya namaskar has been handed down from the enlightened sages of the Vedic age. The sun symbolizes spiritual consciousness, from ancient times is worshipped on a daily basis. In Yoga the Sun is represented by Pingala or Surya nadi, the pranic channel which carries the vital, life-giving force. Its versatility and application make it one of the most useful methods of inducing a healthy, vigorous and active life, while at the same time preparing for spiritual awakening and the resulting expansion of awareness.
Surya Namaskar is a set of asanas in combination of 12 steps. These steps comprise 8 asanas and 4 asanas are repeated. All the 12 steps done in proper sequence to complete the process of one round of Surya Namaskar.
In this Post we Will Give you information About following Topics
- 12 poses of surya namaskar
- Surya namaskar steps with pictures and benefits
- Surya namaskar yoga benefits
- 1 set of surya namaskar means
- Surya namaskar for beginners
- Surya namaskar video
- surya namaskar poses name
- Suryanamaskar Steps to Follow
Suryanamaskar can be done at any time of the day. However, the best time to do Suryanamaskar is at sunrise as exposure to the sun activates our solar plexus.

Siddha Sthiti (Start position)
Many call it as Pranamasan.
Stand erect with feet together. Join the palms together in front of the chest in a ‘namaskar mudra’. Concentrate on standing straight, steady and in a meditative mood.
This posture helps to induce a state of introversion, relaxation and calmness. It activates the anahata chakra or pranic centre an energy centre located in the heart region.
Breathing: Slow and steady breathing.

Suryanamaskar Step – 1 Hast utthanasan (Purak – Inhale)
- Breath-in, lift the arms up and bend back, keeping the biceps close to the ears.
- Stretch both arms above the head, palms in namaskar position. Arch the back and stretch the whole body.
- Eyes focussed towards the sky.
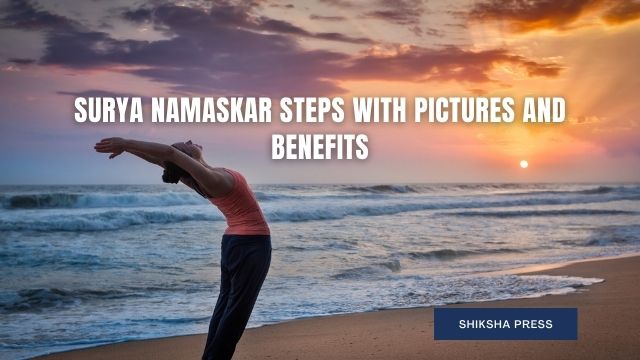
- This posture stretches the chest and the abdomen and lifts the prana (energy) upwards to the upper parts of the body.
- Breathing: Start inhaling as you stretch both arms, and hold breath in the stretched arm position. (Purak)

Suryanamaskar Step 2. Paadahastasan (Rechak – Exhale)
-
- Bend the body forward from waist and stretch down,
keeping the spine straight. Keep the legs straight and perpendicular to the ground. Knees not to be bended.
-
- Try to place your palms on the floor in open position
near both side of your legs. Or if it is not possible then try at least to touch the toes of your legs with the finger tip of both hands.
-
- Try to touch your knees with your head.
- This posture massages the abdominal organs. The power
of digestion increases and gynaec disorders such as menstrual irregularities are relieved. A healthy flow of blood is sent to the spinal nerves as they are stretched and toned. The hamstring muscles at the back of the thigh and calf muscles are also stretched. Inversion increases blood flow to the brain.
-
- Breathing: Start exhaling (rechak) as you bend forward.
Exhale fully as you reach the bent position.

Suryanamaskar Step 3. Ashwa Sanchalanasana (Purak – Inhale)
- Extend the left leg back and drop the left knee to the ground.
- The right knee is bent up and right foot is placed between the palms, flat on the ground.
- Lift the spine and expand the chest. Look upward towards the sky and concentrate at the centre of eyebrows.
- Breathing: Start inhaling (purak) and fill your lungs as you reach to the final posture.

Suryanamaskar Step 4. Dandasana (Rechak – Exhale)
- As you breathe out, take the right leg back and bring the whole body in a straight line.
- Keep your arms perpendicular to the floor.
- The body looks like a slide in its final position.
- Lorem ipsum dolor sit amet, consectetur adipisicing elit.
- Breathing: Exhale fully as you reach the bent position. (Rechak)

Suryanamaskar Step 5. Ashtangasan (Kumbhak – Neither inhale nor exhale)
- Gently drop both knees to the ground and slowly slide the body down at an angle as you bring the chest and forehead to the ground.
- The two hands, two feet, two knees, chest and forehead (eight parts of the body) should touch the floor. The buttocks are kept up.
- This posture develops the chest and strengthens the arms. It sends additional blood to this area helping to rejuvenate the nerves.
- Breathing: Keep the breath out in the exhaled position (bahya kumbhak) as you reach the final posture.

Suryanamaskar Step – 6 Bhujangasan (Purak – Inhale)
- Lower the hips while pushing the chest forward and upward with the hands, until the spine is fully arched and the head is facing up.
- The toes, knees and palms remain in same position as in the last posture.
- Upper part of the body from the knees is stretched upward. Head towards the sky.
- Focus your awareness at the base of spine and feel the tension from the forward pull.
- make a gentle effort to push the chest forward.
- This pose gives dynamic expansion to the organs of the chest and abdomen, relieving many ailments such as asthma, constipation, indigestion, kidney and liver problems. It is very helpful in relieving tension in the back muscles and spinal nerves.
- Breathing: Start inhaling as you stretch your body upward and hold breath (purak) as you stay in this posture.

Suryanamaskar Step – 7 Parvatasan (Rechak – Exhale)
- Raise the buttocks and move the head inward between the arms and facing the thighs so the body forms a triangle with the floor.
- Keep the palms flat touching the floor. Place both feet flat on the ground. Try to place the heels flat on the ground.
- Focus your awareness at the neck area. This posture strengthens the nerves and muscles in the arms and legs, stretches the calf muscles and makes the spine straight and taut. It relieves varicose veins and tones spinal nerves.
- Breathing: Start exhaling (rechak) and completely exhale as you reach the final posture.

Suryanamaskar Step 8. Ashwa Sanchalanasana (Purak – Inhale)
- Same as position no 3 but this time bring the left foot forward in between the two hands.
- The right knee goes down on the floor.
- Place the left foot exactly between the two hands and the left calf perpendicular to the floor. In this position, make a gentle effort to push the hips down towards the floor, to deepen the stretch.
- Breathing: Start inhaling (purak) and fill your lungs as you reach the position.

Suryanamaskar Step 9. Pad-hastasan (Rechak – Exhale)
- Breath-out, bring the right foot forward. Join both legs. Keep the palms on the floor and come back to Posture 2.
- Bend the body forward from waist and stretch down, keeping the spine straight. Keep the legs straight and perpendicular to the ground. Knees not to be bended.
- Try to place your palms on the floor in open position near both side of your legs. Or if it is not possible then try at least to touch the toes of your legs with the finger tip of both hands.
- Try to touch your knees with your head.
- Breathing: Start exhaling as you take the position.

Suryanamaskar Step – 10 Pranamasan
- Straighten the body and bring the hands in namaskar position in front of the chest as in the start position.
- Stand erect with feet together.
- Concentrate on standing straight, steady and in a meditative mood.
- This posture helps to induce a state of introversion, relaxation and calmness.
- Breathing: Slow and steady breathing. (PurakRechak)
- This completes one rotation of Surya Namaskar.
Benefits of Suryanamaskar
Along with numerous health benefits, Surya Namaskar provides a stepping stone in the direction of a healthy lifestyle. Just the single act of doing the practice in the morning sets the tone for an energetic and positive day. The process of waking up early to workout 13 Suryanamaskar can enhance your productivity by giving you more time and energy for the things you enjoy doing. Of course the health benefits are some of the most important things to focus on.
- The general posture of the body is improved with the creation of a strong and flexible spine.
- Improvement of blood circulation to the whole spinal and para-spinal area.
- Enhancement of musculoskeletal functions of the upper and lower limbs.
- Cardio-respiratory functions are improved.
- Metabolism of the body is improved.
- Activation of the sluggish neuroendocrine system.
- Boosts immunity system.
- Digestion is improved.
Click Here To Download Suryanamaskar Steps and Mantra Pdf
Source: 75suryanamaskar


